JS-Tap Mark II: Now with C2 Shenanigans


JS-Tap is a tool intended to help red teams attack web applications. I recently blogged about the data collection capabilities in JS-Tap version 1.0, and data collection is still the primary purpose of JS-Tap. However, for version 2.0, I wanted to refine the usability and scalability of the application and add the ability to execute custom JavaScript payloads on JS-Tap clients.
The back-end JS-Tap server (Python/Flask) has been refactored to be compatible with Gunicorn, which allows for multicore/threaded serving of the JS-Tap server. This allows JS-Tap to handle many more clients simultaneously. Prior demos have only shown using JS-Tap in single-threaded developer mode, but this is not how you would host the server for an actual engagement.
To use JS-Tap on an engagement, you’ll want a multicore VPS with nginx installed. JS-Tap has a proxy mode configuration that runs it with plain HTTP and skips using the self-signed certificate. You should configure nginx to handle the TLS certificate, and instructions on how to do so with Let’s Encrypt can be found here:
https://www.nginx.com/blog/using-free-ssltls-certificates-from-lets-encrypt-with-nginx/
To configure JS-Tap to work with nginx as a proxy, you’ll want to enable proxy mode. This not only starts JS-Tap with HTTP, but it also changes how it determines the IP address of clients connecting. In proxy mode, JS-Tap pulls the client IP address from the X-Forwarded-For header that nginx needs to set.
If you’re using single-threaded developer mode, at the top of the Python/Flask script is a proxyMode flag you can set:

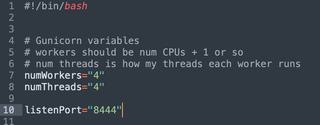
If you’re setting up nginx, you’ll likely be running JS-Tap with Gunicorn, and the Gunicorn startup script (jstapRun.sh) has a separate configuration for proxy mode. At the top of the jstapRun.sh script, you can enable PROXYMODE:

Inside the jstapRun.sh Gunicorn script, you’ll also want to tweak the number of workers and threads for the JS-Tap server. Workers are heavyweight forks, and you’ll want at least one (1) per CPU core in your server. An “N + 1” approach works well here. The threads are the number of serving threads per fork/worker. JS-Tap is very I/O-heavy, so having a decent number of threads per worker is a good approach. I would recommend at least four (4) threads.
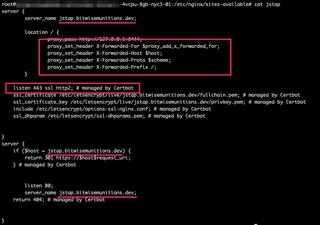
Once you have your nginx configured with your Let’s Encrypt certificate, your nginx site configuration should look similar to the following example. Note that if you want nginx to use HTTP/2, you can set it in the configuration file “listen 443 ssl http2;”. Also, make sure you set the “proxy_set_header” values, so that JS-Tap knows the client IP address.
/etc/nginx/sites-available/jstap:
There are also some basic nginx configuration changes I recommend in /etc/nginx/nginx.conf. At the top of the configuration, I recommend setting “worker_processes auto;”. This tells nginx to automatically scale up the number of nginx processes to the number of cores in the VPS. In the events block of the nginx.conf file, I tend to also increase the “worker_connections” setting. You’ll also need to ensure the “client_max_body_size” is increased so that screenshot uploads aren’t blocked by nginx.

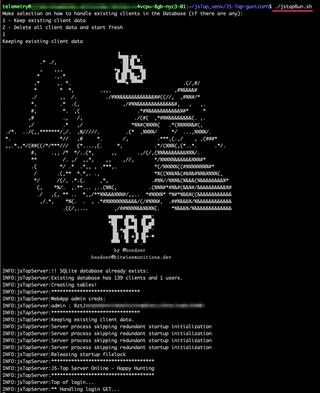
Be sure to restart nginx after making configuration changes. Once that is ready, you can start your JS-Tap server by running the Gunicorn startup script:
Ok, now that we have the production serving configuration stuff out of the way, let’s go over some of the new features in JS-Tap.
I have found that, in practice, I often want multiple JS-Tap payloads with different configurations. This allows me to target multiple applications simultaneously. JS-Tap now has a payloads directory. Any file in this directory is served by the JS-Tap server, so you only need to copy the payload to a new filename and change the configuration.
I also found that targeting multiple applications simultaneously made it a challenge to navigate the clients list in the JS-Tap portal. The JS-Tap payload now has an optional “client tag” configuration.
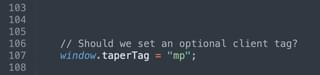
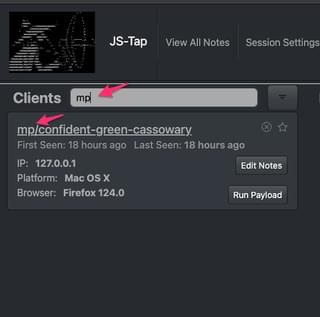
I’ve used short tags to indicate what application a particular payload was injected into. The tag is prepended to the client nickname in the JS-Tap portal.

These tags are convenient to use with the new client filter at the top of the client list.
Now, we can cover the fun stuff.
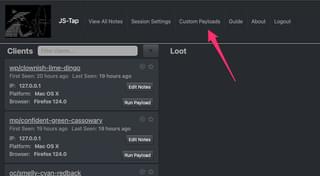
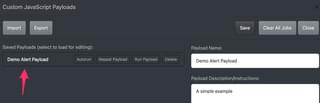
JS-Tap 2.0 has a custom payload C2 system that allows custom JavaScript payloads to be executed on clients. To create JavaScript payloads, you need to open the Custom Payloads UI.
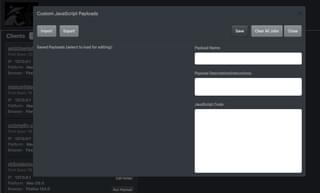
Saved payloads will show up on the left side, and the editor is on the right side. Let’s create a simple payload, for example.

Once you save the payload, you’ll see it show up in the saved payloads list.
Now that we have a saved payload, let’s go over the options for running this payload on clients.
Autorun:
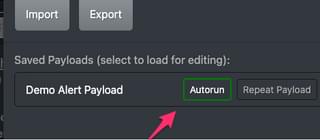
When autorun is enabled, when a JS-Tap client connects to the C2 server for the first time to establish a session, the payload will be automatically run once on startup.
Repeat Payload:
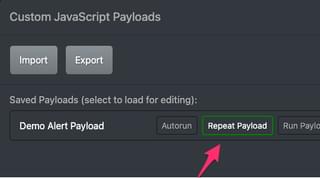
The repeat payload feature has JS-Tap clients re-run the payload every time they check in for tasks. This allows you to add code to run repeatedly on clients. When you toggle this feature on in the Custom JavaScript Payloads UI, the repeat payload feature is enabled for all clients. How often a client checks in for tasks is a configuration in the JS-Tap payload. You can also set a “jitter” so that the task checking is variable in time range.

The JS-Tap payload also has functions to change these values, so it’s easy to have a custom payload setup just to modify these values on the fly. Here’s an example of a payload that slows down the task checking. You can always speed it back up later:

Run Payload:

When you press the “Run Payload” button in the Custom JavaScript Payloads UI, the payload will be run once on all clients.
The delete button will delete the payload from the database. You can export, edit, and reimport payloads with the import and export buttons. The format of the payload files can be found in the README here if you wish to generate these externally to the JS-Tap portal:
https://github.com/hoodoer/JS-Tap/tree/main?tab=readme-ov-file#custom-payloads
What if you want to run payloads on a single client instead of all clients? Once you have custom payloads saved in the system, pressing the “Run Payload” button on an individual client will bring up the payload list:

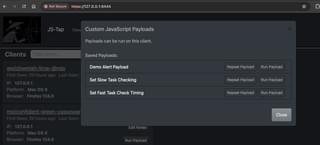
There are only two (2) options in this menu. You can toggle on the “Repeat Payload” button, and that payload will run repeatedly on task checks from the specific client. The “Run Payload” button will run that payload just once on the specific client.
If you want to quickly cancel all toggled-on tasks and clear all scheduled payload tasks, you can press the “Clear All Jobs” button in the main Custom Payloads UI.

So, what kind of custom payloads might be useful? You can find some examples of WordPress payloads in my repo:
https://github.com/hoodoer/WP-XSS-Admin-Funcs
There are payloads in there for adding new admin accounts, getting code execution, popping meterpreter shells, etc.
If you’re interested in learning how to write JavaScript payloads that achieve specific goals, we have a webinar that covers that development process (Popping Shells Instead of Alert Boxes – Weaponizing XSS for Fun and Profit).
I also have a free VM workshop to walk through the development process seen in the webinar:
Workshop VM (x86-64): https://download.hoodoer.com/vm.ova
Workshop Guide: https://download.hoodoer.com/guide.pdf
With JS-Tap capturing HTML code of applications and intercepting form submissions and network API calls, red teamers should be able to provide that information to their application pentesting team to create tailored payloads as well, if the red team isn’t as well versed in JavaScript programming as their AppSec colleagues.
A future blog post will cover how to use the just released mimic feature that automatically generates tailored payloads within the JS-Tap portal.
That covers the major new features in version 2.0 of JS-Tap. Changelogs for JS-Tap are posted in the Announcements in the GitHub repo:
https://github.com/hoodoer/JS-Tap/discussions/categories/announcements
The source code for JS-Tap can be found here:
https://github.com/hoodoer/JS-Tap
If you’re interested in watching a demo of version 2 with the data collection and C2 features, and seeing methods for using JS-Tap as a post-exploitation implant check out my presentation from HackSpaceCon:
https://youtu.be/aWvNLJnqObQ?t=11719
A shorter demo of jus the data collection features in version 1 was presented at ShmooCon:
https://youtu.be/IDLMMiqV6ss?si=XunvnVarqSIjx_x0&t=19814
If anyone has questions or ideas, my DMs are always open @Hoodoer.