Upgrade Your Workflow, Part 2: Building Phishing Checklists

Continuing on the idea of creating checklists, (see previous blog about OSINT checklists), I wanted to share my personal phishing checklist. This list is what I use to make sure I have covered all my bases before firing the email. Some of these items may or may not be used, depending on your pretext.
TLDR: Checklist at the end of the post
Target Verification:
Verify that the intended recipients exist. If this is a general phishing campaign where you are testing end-user awareness, this can be done by working with your client. Otherwise, it might be best to take your target list of users and implement something like Paul Burkeland's onedrive_user_enum or Und3rf10w’s http_timing_attack.py (for Outlook Web App (OWA)) to cut down the list of valid recipients.
If your list of intended recipients is small, take some time and research a bit more about your targets. Is the pretext about some change in company policy? Then do not target an employee who has been with the company for 10+ years. Is your pretext about a security/software update? Then do not target someone in IT, etc.
Sender Verification:
When sending a phish, there are three (3) things to be concerned about:
- Will it entice a click/action?
- Will it pass client security controls?
- Will it leak any unwanted data that could burn this or future campaigns?
Digging deeper into number three (3), let’s look at some OpSec actions you can take to keep you safe. First, if you use Office 365 to send your phish, (even when done through a browser), your IP address will be included in the email headers. Use a VPS or VPN to send your emails to ensure that the IP information does not match your sending organization. Similarly, do not use an account tied to your organization or your own identity. Stand up a free trial or use a burner account.
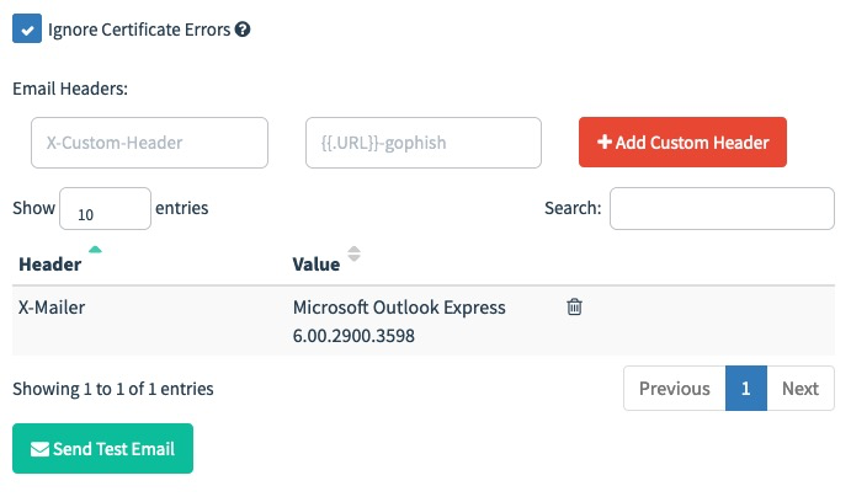
If you are using a tool like GoPhish to manage your campaign, note that emails sent from the app will include the following mail header:
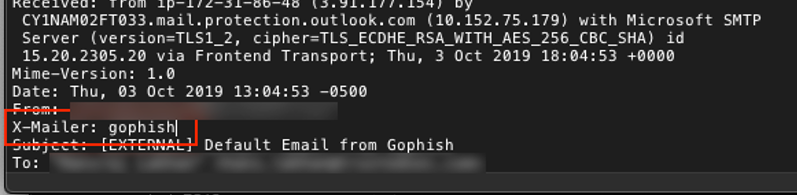
To fix this, go to your Sending Profile, and change the header to something less obvious. Doing so will automatically overwrite the tag set by the application.
X-Mailer: Microsoft office outlook, build 17.551210
When picking a domain to send from, it can be helpful to find one that is either recently expired or is hijackable via subdomain hijack. For the former, I recommend
Mr-Un1k0d3r’s CatMyPhish (https://github.com/Mr-Un1k0d3r/CatMyPhish). If you choose to roll with your own, you can submit your domain for categorization using the links below. It is advisable to have a website hosted at the domain you are categorizing. Specifically, try to match the content to the category you are aiming for. You can always change later ????
Tip: If you have logging enabled on your webserver during the domain categorization process, you can collect those IP/nets and blacklist or redirect them afterwards, as you already know they are tied to spam/reputation-checking services.
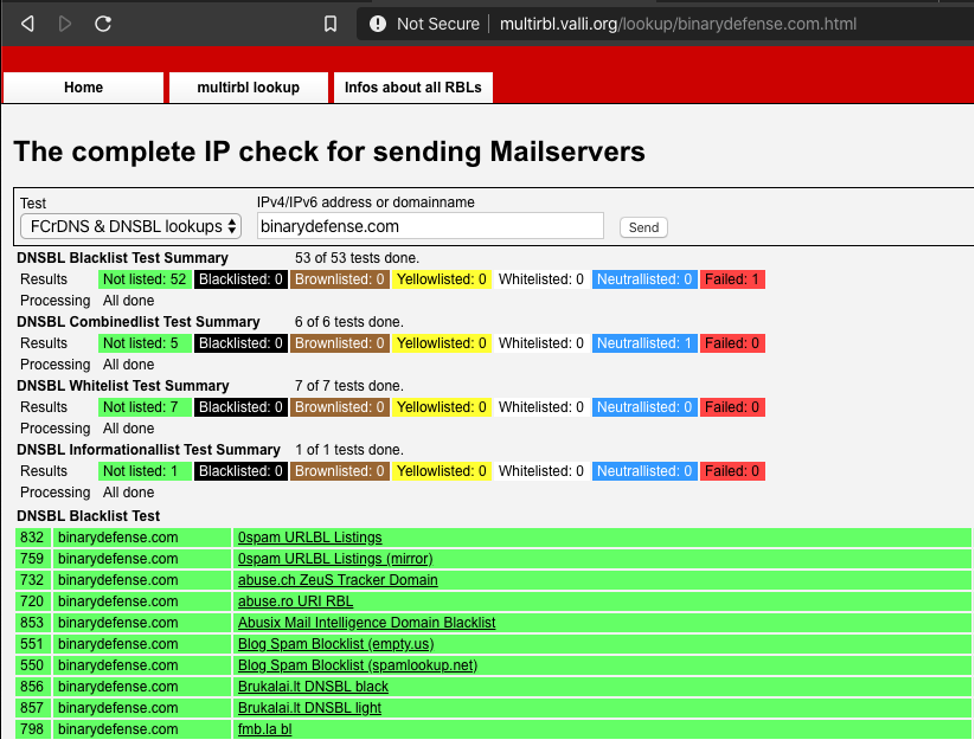
While you can use the above links to verify if your domain has been properly categorized, you can also use http://multirbl.valli.org/ to check on your sending domain, website domain, and email sending IP address to make sure they are not on any blacklists.
Also, check to make sure that you have properly set the SPF and DMARC records for your domain—a coworker’s phish was picked up as suspicious when this was missing from their DNS records.
Lastly, if you are working with a client to test the end-user’s awareness program and not their technical controls, work with the client to whitelist your email/domain. Furthermore, test the whitelist to confirm the message will go through when it is time to send.
Email Content Verification
Nothing will kill a phish like bad grammar or spelling. Similarly, language and word choice matters. Colloquialisms like ‘yo’ or ‘hey’ fall flat when announcing a new HR policy. Compare your language to the language used by the company you are impersonating. Use industry-related terms when appropriate.
If you are sending an HTML -based email, test the contents on multiple email clients to verify that it renders properly— a victim cannot click your link if they cannot find it.
Landing Page Verification (Credential Harvest):
Similar to the email, make sure grammar and spelling mistakes have been corrected before launching and that the page properly renders on multiple operating systems and browsers.
Make sure your domain is properly categorized for the content it is hosting. The best option I have found to evade content filtering are health, government, and finance. Use the table above for categorizing your landing domains.
Make sure your site is properly redirecting from http to https. Also, confirm proper redirection after users submit their credentials.
If you are collecting user credentials, be sure to protect them in the event that the site is ever compromised. Similarly, make sure the site is up to date with all the necessary patches and that SSH is not reachable to outside parties.
Landing Page Redirection:
By using tools like mod_rewrite for Apache, you can redirect unwanted traffic from your landing page. This works great to prevent Incident Response from poking at your site and helps ensure a proper categorization from third-party security solutions. For more help, check out Jason Lang’s AAI class at Kernelcon (https://kernelcon.org/agenda#aai) and Jeff Dimmock’s blog post (https://bluescreenofjeff.com/2018-04-12-https-payload-and-c2-redirectors/).
Key criteria to redirect on:
- Traffic from unwanted IP addresses
- Traffic using unwanted URIs
- Traffic using and unwanted user-agents
If you are hosting a payload as opposed to collecting credentials, make sure the site properly identifies the operating system/browser of the victim before deploying the payload. HTAs do not work well on Macs.
Summary
This checklist runs through some of the basic steps I take before sending a single phish. Its purpose is to make sure I do not make an obvious mistake and have all of my bases covered. The next checklist in this series will be on Payloads. Stay Tuned.
The Pre-Phish Checklist
Target Verification
☐ Verify email addresses of selected targets
☐ Verify targeted users are active (not disabled or on leave)
Sender Verification
☐ Logged in as account not tied to company
☐ Send from IP address not associated to company
☐ Tool OPSEC considerations
☐ Sender reputation
☐ Sender signature and logo
☐ Verify DMARC and SPF
☐ Whitelist verification
Email Content Verification
☐ Verify grammar and spelling of email content
☐ Verify To, From, and Subject fields are correct for operation's methodology
☐ Verify content renders in iOS, Android, and Outlook
☐ HTTP->HTTPS redirection is working
Landing Page (Credential Harvest)
☐ Renders on Windows, Mac, Linux, iOS, and Android
☐ Domain properly categorized
☐ SSL encryption
☐ Credentials stored securely
☐ Redirect on user submission
☐ Verify logging